Monday, February 25, 2013

Baked Ham & Swiss Sandwiches

King Hawaiian sandwiches

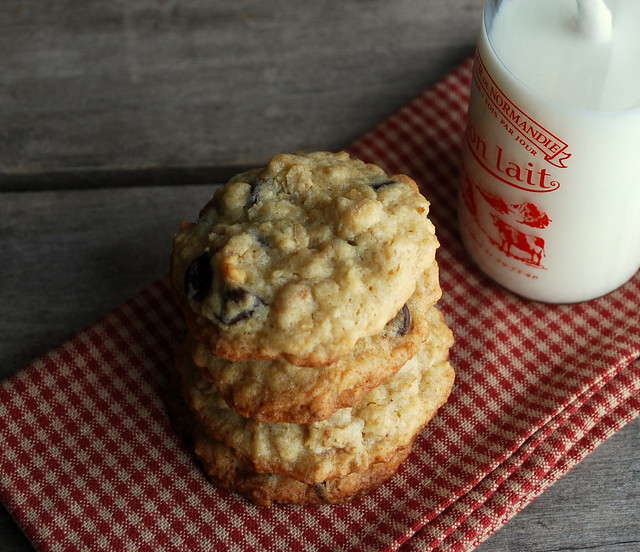
We just bought King Hawaiian rolls for the first time last week. I had heard of them, but I could never find them in Rhode Island until just recently.

I knew they were sweet and probably were a little like potato rolls, which my kids love, so I was pretty sure they would be a hit.

I found mine at my local BJ's Wholesale Club. As with most things in a wholesale club, they came in large package, so I had more than enough to make this recipe.

As I suspected the boys love them. Evan ate them for breakfast with a little butter and a glass of chocolate milk. He has some strange food combos.

We had a bit more snow come down when I made these. No where near the amount that we had from the last storm! That was crazy snow. While shoveling commenced, I was toasty warm inside cooking and baking. As the only female in my house, I think that's the way it should be!

King Hawaiian sandwiches.1jpg

You can prepare these in advance and store in the fridge until ready to bake.

Pin It

Baked Ham and Swiss Sandwiches
adapted from a recipe at Kings Hawaiian
1-12 pack of King’s Hawaiian Original Rolls (I could only find a larger pack at a wholesale club. I used as many buns as I could fit into the pan. I believe it was 16).
1 pound deli ham, thinly sliced
1 pound. Swiss cheese, thinly sliced
1 1/2 sticks butter
3 tablespoons Dijon mustard
1 1/2 teaspoons Worcestershire sauce
1 shallot, finely chopped (or 1 small onion)

Heat oven to 350. Melt butter and mix in mustard, Worcestershire sauce and shallot. Simmer for 5 minutes.

Cut the rolls in half, horizontally (keeping all top and bottom halves intact).

In a greased 9×13 pan, place bottom half of rolls and top with the ham and cheese. Replace the tops of the rolls and pour the butter mixture over top. You can refrigerate overnight or bake immediately.

Cover and bake for 20-25 minutes. I checked the bottom to make sure it wasn’t super soggy. If they are put them back in for a few more minutes. Cut apart to serve.

Thursday, February 21, 2013

German Butter Pound Cake

Pin It

German Butter Pound Cake cut

I'm so glad I get to share this amazing pound cake recipe with you all.

I found it in the latest edition of Taste of Home magazine and let me tell you, it's a keeper. It was a recipe passed down from a German Grandma.

One of my best friends grew up in Germany. She loves and misses a lot of German foods, so when I come across something that's German, and I know it's something she loves, it's a no brainer for me.

She isn't one for birthday cakes loaded with icing, or anything too very sweet, but pound cake....she loves pound cake. She also has big love for crisps and coffee cakes but that's another post.

I wanted to make a dessert for the Super Bowl party we had at the beginning of the month and I thought this cake would be perfect. Portable for screaming football watchers to grab and go.

German Butter Pound Cake 1

This cake was so delicious and so moist. We all loved it. In fact the whole cake went! The whole thing. I saved one little piece for my Mom, and after she ate it she called me to tell me how good it was. "That was the best pound cake I ever had".

She may be right.

The hint of lemon gave it just a touch of brightness and the almond and vanilla extract together pulled it all together.

The recipe said to sprinkle it with confectioners sugar, I didn't even have time to before it was gobbled up.

This will be my go-to pound cake recipe from now on. I see it slathered in strawberries and cream this summer.

German Butter Pound Cake
slightly adapted from a recipe at Taste of Home
6 eggs, separated
1 cup butter, softened (2 sticks)
2 cups sugar
1 tablespoon grated lemon peel
1 teaspoon vanilla extract
1/2 teaspoon almond extract
1-1/2 cups all-purpose flour
2 teaspoons baking powder
1/2 teaspoon salt
6 tablespoons 2% milk
Confectioners' sugar for dusting

Place egg whites in a large bowl; let stand at room temperature for 30 minutes. Generously grease and flour a 10-in. tube pan.

In a large bowl, cream butter and sugar until light and fluffy. Add egg yolks, one at a time, beating well after each addition. Beat in lemon peel and extracts. In another bowl, mix the flour, baking powder & salt; add to the creamed mixture alternately with milk, beating well after each addition.

With clean beaters, beat egg whites on medium speed until soft peaks form. Fold into batter.

Transfer to prepared pan. Bake at 350° for 50-60 minutes or until a toothpick inserted in center comes out clean. Cool in pan for 10 minutes before removing to a wire rack to cool. Sprinkle with confectioners' sugar. Yield: 16 servings.

Tuesday, February 19, 2013

Pickled Shallots

Pickled Shallots

I think people either like pickled things or they don't.

I think I've always loved pickled things.

I remember as a kid we had a neighbor we called Pépé Paul, an old French gentlemen who had chickens in his yard and a root cellar. He would let the neighborhood gang go down into the cellar on hot days to cool off from the heat. It was loaded with canning jars filled with green beans and pickles and pearl onions and cucumbers, too many things to even name. I remember staring in awe at row upon row of all those hundreds of jars filled with food.

On occasion, he would let us carry up a few jars and each one of us kids would dig into them with our grubby little hands. I clearly remember eating a pickled egg and loving it while my friends gagged and spit it out.

Pickled Shallots

He once chopped a chickens head off in front of us all too. Looking back I think he was trying to see if he could shock us. I don't know if it shocked me at the time, but I sure do remember it!

My love of pickled foods is still strong. I think it's cause I love vinegar so much.

I love onions too, so very much, so this recipe was perfect for me.

These crunchy shallots would be great in salads and on just about any sandwich you can whip up. I eat them straight outta the jar too!

Pickled Shallots

Next time I make these, I may thrown in some chopped garlic too.

If you a lover of pickled foods like me, you'll go mad for these!

Pickled Shallots
recipe from Southern Living

1 1/2 cups thinly sliced shallots (that was 6 large shallots for me)
3/4 cup water
3/4 cup red wine vinegar
1/3 cup sugar
2 tablespoons kosher salt
pinch dried crushed red pepper (optional)

Bring the water, vinegar, sugar, salt and pepper to a boil, whisking until sugar is dissolved. Place chopped shallots into a sterilized canning jar. Cool to room temperature. Store in fridge. Makes 1 1/2 cups.

Wednesday, February 13, 2013

Strawberry Nutella Hand Pies

Strawberry Nutella Tart

Valentines Day is almost upon us. I know for some folks it's a romantic holiday filled with flowers and candy and candlelit dinners, for us it's just another day in February.

I know that probably doesn't sound very nice to those of you who do celebrate, but that's just how it is. Keeping it real.

As I've said before, I'm lucky enough to have a wonderful husband who makes every day of my life better by just being in it. He's romantic a whole lotta days during the year, not just February 14th.  It's true. We don't need no stinkin' holiday!

Now that's as mushy as I'm going to get dammit!

On to hand pies! yum!

I stumbled upon a blog called FOLK and talking about LOVE.....I'm in love with this blog and it's magazine. It's everything I love rolled into one....beautiful photographs, delciious recipes, rustic inspiration....well this is what they'll tell you about themselves.....

FOLK magazine is devoted to presenting a fresh and youthful interpretation of simple country lifestyles, while focusing on the stories that make America our collective home sweet home. This down to Earth magazine fills a unique niche in the shelter publication landscape: content is part lifestyle, part editorial, all heart.

See everything I love! I subscribed to the magazine and I can't wait to get my first copy!

I saw their recipe for Nutella Blackberry Hand Pies and I feel head over heels! Since I didn't have blackberries on hand, I subsituted strawberries. I think the red was very Valentiney don't you?

I don't need to tell most of you about my BIG LOVE for Nutella.

Nutella Strawberry and flakey pie crust...can it get any better??


Strawberry Nutella Tart 2

Strawberry Nutella Hand Pies
1 Package pre-made package refrigerated pie crusts (2 crusts)
1 Container Nutella
1 Cup fresh or frozen (thawed) berries of your choice
2 Tablespoons sugar
2 Tablespoons flour
2 Tablespoons granulated sugar
1 Egg yolk
1 Tablespoon heavy cream

Berry mixture:
Combine your berries with the sugar and flour bringing to a simmer. Slightly crush the berries with potato masher or fork leaving some still whole. Allow to thicken and then cool.

Pre-heat oven to 425 degrees.

Roll out 1 pie dough crust until about 1/8th inch thick. Using a large round cookie cutter or large coffee mug or cup, cut approximately 6 circles out of the pie dough. I used a 4 inch soup mug for my circles. I did re-roll the dough twice to get the last 2 circles.

Place dough circles onto parchment paper covered cookie sheet. Top each circle in center with a heaping tablespoon of Nutella and then a heaping tablespoon of cooled berry mixture.

Roll out 2nd pie dough crust until about 1/8th inch thick. Cut circles and using small heart shaped cookie cutter cut out hearts in center of each circle. I didn't have a cutter that small so I just cut the little hearts in the middle out by hand.

Top bottom circles with top circles, pressing edges together. Crimp edges with fork. Whisk together yolk and heavy cream. Brush egg mixture on each pie. Sprinkle with sugar. Bake for 12 - 15 minutes on middle rack. The original recipe called for 20 minutes, but when I checked at 12 minutes, mine were done. Allow to cool before serving.

Monday, February 11, 2013

Oatmeal Chocolate Chip Cookies aka Plow Payment


Oatmeal Choc Chip Cookies

Well we made it through the blizzard. The snow starting falling mid-morning on Friday and didn't stop until Saturday early morning. At some points it was coming down as fast as 3-4 inches an hour. Combine that with 50-60 mile an hour winds and you have yourself a pretty intense Nor'easter.

We didn't lose power, which we were very thankful for. On Saturday 184,000 homes here were without power, which means without heat! Yikes!

When we woke up Saturday morning there was a lot of snow...I mean a whole lot. I've lived in Rhode Island my whole life, experienced the blizzard of '78, but I don't ever remember seeing this much snow. We had to open the front door in the morning just to be able to see outside. Snow had drifted up to most of the windows. The doors were snowed in too, so we ventured out to the garage to get out. We measured 31 inches when we opened the garage door. I have a picture to prove it.

31

John shoveled a path to my birdfeeders. They were swarming around his head trying to get to the seed. We filled our feeders up 3 times! Hungry birdies. Most of them were perched on the gazebo frame waiting their turn.

birds

That fence you see covered in snow is about 4 feet tall.

Blizzard 23

We were offically snowed in.

It took all day to shovel us out. It's times like this when having teenage boys comes in mighty handy. They worked on uncovering the back door.

Blizzard 24

Here's a little before and after.

2013-02-08

There was a whole deck under all that snow.

Luckily we have wonderful neighbors who have a plow. Our friend Tom came and did the end of the driveway for us, saving us hours of shoveling.

What does Tom ask for in payment for plowing?

COOKIES!

I can handle that. I happily spent the day inside cooking and baking. Tom got a plate full of Oatmeal Chocolate Chip Cookies and some Blueberry Banana Bread (post coming!).

We were happy and he was happy. Win win!

We spent the afternoon relaxing. John was pooped. The rest of my day pretty much looked like this:

afternoon


I cuddled up in my blanket. John snoozed on the couch. I drank tea. I read magazines. I lit candles. It was perfect.

I love a snow day.

Here's the recipe for the cookies. They made the day even more perfect.


Oatmeal Choc Chip Cookies 1


Oatmeal Chocolate Chip Cookies
1½ cups all-purpose flour
½ teaspoon baking powder
½ teaspoon salt
1 cup (8 ounces) unsalted butter, softened but still cool
1 cup light brown sugar
1 cup granulated sugar
2 eggs
2 teaspoons vanilla extract
2 cups old-fashioned rolled oats
1½ cups semisweet chocolate chips

Oven to 350 degrees. Adjust oven racks to low and middle positions. Line baking sheets with parchment paper.

Whisk the flour, baking powder and salt in a small bowl; set aside. Cream together the butter and both sugars on medium speed until light and fluffy, about 3 minutes. Beat in the eggs, one at a time, and then mix in the vanilla.

Stir in the flour mixture with a wooden spoon or a large rubber spatula, then stir in the oats and chocolate chips.

Using 2 heaping tablespoons per cookie, roll the dough into balls and place on the cookie sheets, spacing them at least 2 inches apart. Bake until the cookie edges are just turning golden brown, but the middles are still quite pale, about 12 to 14 minutes, rotating the sheets from front to back and top to bottom halfway through the baking time. Cool the cookies on the baking sheets for 2 minutes, then transfer to a cooling rack to cool for at least 30 minutes. Cookies can be stored in an airtight container at room temperature for up to 5 days.

Thursday, February 7, 2013

Parmesan Roasted Cauliflower

Roasted Parmesan Cauliflower RI

We have a monster storm headed our way here in New England. We might get up to 30 inches of snow, so I figured I'd better get this post out in case we lose power. I've got lots of comfort foods planned for this weekend. I hope I get to make them!

For some people mac & cheese may be your ultimate comfort food, or maybe it's your Mom's meatloaf. Growing up with a Mom, Grandma and Sicilian Nonna who were all great cooks that had comfort food looking a little different to me.

I can honestly say my Nonna never made mac & cheese in her lifetime, my mom either. It just wasn't food that my Dad or Nonno would have eaten. Comfort food looked just a little different in my family:

  • Artichoke omelets
  • Figs cookies
  • Crusty Sicilian bread
  • Baccala (dried fish)
  • Nonna's homemade ravioli
  • Home made cannoli
  • Easter bread (with sprinkles and eggs baked into the top)
  • My Aunt Paula's Struffoli (little balls of dough and honey)
  • Nonna's Sfingi (a sugared puff pastry)
  • Nonna's sauce (which my cousin reminded me she always put a pinch of sugar in to cut the acidity)
  • Crispy chicken cutlets
  • Breaded fried cauliflower

Fried cauliflower! Since I've been a little girl I've eaten it and loved it.

My Nonna made it and now my Mom makes it and now make it now (you can see my recipe here.) It's always been comfort food to me.

I'll admit it. I'm a cauliflower lover but I don't care for raw cauliflower. Fried I'm obviously ok with and now roasting it is a favorite too. Once you roast it and bring out that nutty goodness you'll never look at cauliflower the same way again.

This is a super easy recipe. Grab a head of cauliflower, break it into florets, add in some onions, garlic and thyme, top it off with some olive oil and then some cheese. It's like candy to me. Right up there with my obsession with caramelized onions.

I could have eaten that whole pan full. I kid you not.


Roasted Parmesan Cauliflower 1 RI2


Parmesan Roasted Cauliflower
slightly adapted from a recipe at Bon Apetit, February 2013

Preheat oven to 425°.

Cut 1 head cauliflower into florets; toss on a large rimmed baking sheet covered in parchment. Add 1 large onion sliced, 4 thyme sprigs, 1 head of unpeeled garlic cloves, and 3 tablespoons olive oil (or enough it coat it); season with kosher salt and freshly ground black pepper.

Roast, tossing occasionally, until almost tender, 35-40 minutes. Sprinkle with 1/2 cup grated Parmesan, toss to combine, and roast until cauliflower is tender, about 5 minutes longer.

Monday, February 4, 2013

Chocolate Chip Cookies with a little secret


CC Cookied with Maple Ext 2

We had a few friends over for the Super Bowl last night. I had not planned on making anything since my team wasn't playing, but one of my best friends called me and said "ah come on, you're not doing anything? I took the night off from work" the next thing you know, it's Tuesday night and I'm planing a menu and shopping for ingredients.

I decided taco dip was in order, cause you can't really watch the Super Bowl without some kind of dip. I think it's actually a rule or something. Brats were on the menu along with roasted Parmesan cauliflower and onions (that recipe is coming up and Lordy it's delicious). I made Alton Brown's Mac & Cheese, and a German Butter Pound Cake (that's also coming up too).

Since my oven was hot I thought I mine as well whip up a batch of these chocolate chip cookies that I saw on Alaska from Scratch. I had a house full of boys that I didn't want to be sniffing around my pound cake, so I thought COOKIES. Yeah that will distract them. I was right. They ate them warm from the cooling rack by the handful.

There is an added little secret ingredient that's not so secret anymore. It just adds that little bit of something special.

I won't make you scroll down and read tough the recipe...it's maple extract, which I just happened to have in my spice cupboard cause I love maple flavored anything.

Just a half teaspoon made such a difference. I don't think I'll ever make chocolate chip cookies without it again.

CC Cookied with Maple Ext

Chocolate Chip Cookies with a little secret
recipe from Alaska from Scratch
3/4 cup butter, softened
1 cup brown sugar
1/2 cup sugar
1 egg
1 egg yolk
1 teaspoon vanilla
1/2 teaspoon maple extract
2 cups flour
1 teaspoon baking soda
1/2 teaspoon salt
1 cup semi-sweet chocolate chips

Preheat oven to 325. Line two large baking sheets with parchment paper.

In the bowl of a stand-mixer fitted with the paddle attachment, cream together the butter and the sugars. Incorporate the egg and egg yolk. Add the vanilla and maple extracts.

In a bowl, sift together the flour, baking soda, and salt. Add them to the mixer and mix until just combined. Add the chocolate chips and beat until it all comes together.

Use a medium cookie scoop to scoop cookies onto cookie sheets (cookies will spread some while baking, so leave some room). Bake the cookies 12-14 minutes, until golden and set on the edges but still a little undone in the center, being careful not to over bake. The cookies will look puffy when they come out of the oven, but let them set on the cookie sheet for 5 minutes and they will settle and look like the ones pictured. Remove to a cooling rack to finish cooling. Best served warm with a glass of milk.